In this series of posts, I will explain how to build a Windows Server 2008 cluster with Server Core and Hyper-V. There will be three posts as linked to below. Each post will be published as it get ready. Each post will have step-by-step snapshots. If it happens a certain image thumbnail is not good enough for you, then click on the snapshot to see a larger image.
1st Part: Hyper-V & Server Cluster – Server preparation
2nd Part: Hyper-V & Server Cluster – ISCSI Storage preparation & Configuration
3rd Part: Hyper-V & Server Cluster – Creating Windows Server Core 2008 & Hyper-V Cluster (You are here)
3rd Part: Creating Windows Server Core 2008 & Hyper-V Cluster:
We now have almost everything ready.
Go to a server that has GUI (e.g. the DC) and run the Failover Cluster tool (you can choose to install the RSATs or to add the Failover cluster feature to get the tool).
Go to Validate a Configuration.
Then add the nodes (don’t ask me why one is called ar-naplab-hv01 and the other ar-techlab-hv02 because I don’t know)
Run all the tests and cross your fingers ….
Next ..
It starts.
It is important to check that the disks were mounted on both nodes while the validation process is running.
Look at the report and make sure that everything is green.
If yellow (warning) or red (failed) appears in the report, see where the error occurred and how it can be fixed.
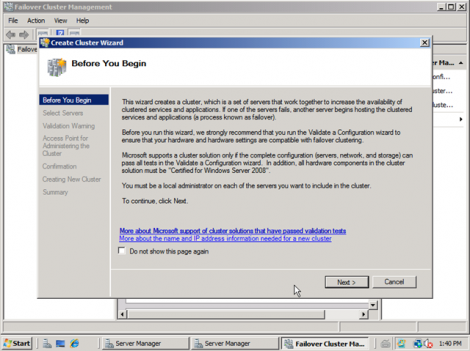
Back in the Failover Cluster tool, click on Create a cluster and Next .
Add the nodes.
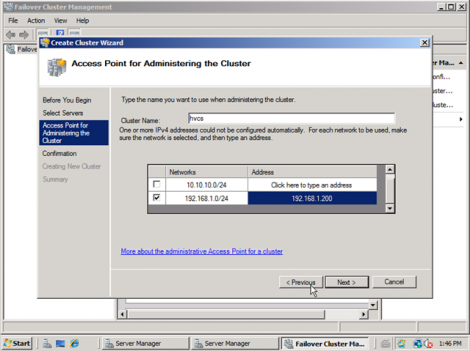
It is now time for the configurations of the cluster name and IPs. I’m going to call mine hvcs (very creative: HyperV Cluster Service), remember that the name does not have the domain, that’s why I only put hvcs and not hvcs.ponicke.ad.
Un-select all networks except those where the cluster will respond to requests and enter the IP address of the cluster, in my case 192.168.1.200
Review everything.
Cross your fingers again…
Ready !!!!!!
Now there’s a nice cluster!
Download the Hyper-V administration tool (64 bits) from:
Connect to the servers with Hyper-V.
And it’s ready to virtualize!
You can also learn about VM deployment on the following link:
http://blogs.technet.com/ponicke/archive/2008/03/19/quick-migration-unleashed.aspx
Thank you ponicke for this last article of the series.


9 responses to “Building a Cluster with Hyper-V and Server Core (Part 3) and Creating a Windows Server 2008 Cluster”
Can you please amend this to add links for Parts 1 and 2?
https://www.virtualizationteam.com/microsoft/hyper-v/building-a-cluster-with-hyper-v-and-server-core-part-1-and-creating-a-windows-server-2008-cluster.html and
https://www.virtualizationteam.com/microsoft/hyper-v/building-a-cluster-with-hyper-v-and-server-core-part-2-and-creating-a-windows-server-2008-cluster.html
seem to have disappeared from http://www.virtualizationteam.com (also can’t find with a search)
Thanks!
[…] 3rd Part: Hyper-V & Server Cluster – Creating Windows Server Core 2008 & Hyper-V Cluster […]
[…] a Cluster with Hyper-V & Server Core (Part 1) and Creating a Windows Server 2008 Cluster Building a Cluster with Hyper-V and Server Core (Part 3) and Creating a Windows Server 2008 Cluster […]
Hi Daws,
It seems you had been able to catch our articles before they really meant to be published due to the third post being published before being ready. Though now all of the three post are cleaned and ready for you to view.
I hope you find them useful.
Enjoy,
MSHyperV
Really great tutorial. I have just spent three hours trying trawling the web and technet on how to do this. I am a VCP on ESX 3.5 and wanted to start using hyperv to see what it’s like. The ms documentation is as usual very long winded so your article was great!
Hi Paul,
I am glad you like it. I hate MS documentation to, as I feel its usually very lengthy.
Enjoy,
Eiad
Thank you for this tip. This bug was driving me crazy…
it works fine if you are ONLY using two nodes at a time. Try three or four nodes and it just fails….. WHY ???
Lol, Ask Microsoft 😛