In my previous two posts, I have demonstrated how to prepare the databases required for the different vCenter 5.1 components(SSO, vCenter Service, & Update Manager) as well how to install vCenter Single Sign On. If you have not went through these earlier two posts, then you will need to follow them before proceeding with this one. These two posts can be found at:
vCenter 5.1 Installation(Part 1) – Preparing the Databases
vCenter 5.1 Installation(Part 2) – Single Sign On Installation
As I have mentioned in my earlier post, the next vCenter 5.1 component to install would be vCenter Inventory Service. In this post, I will demonstrate how to install the vCenter Inventory Service in a step by step fashion. It is important to note that in vCenter 5.1 you have the option to install the vCenter Inventory Service with other vCenter components or on a different server/vm. As I mentioned in my first post in the series, the main reason why sometime you want to install it on a separate VM/Server is if scalability is a concern in your organization and you are approaching the vCenter Scalability limits of 1,000 hosts and 10,000 VMs. In most organizations, where these limits are not even close then installing the vCenter Inventory Server on the same VM/Server running the vCenter Service is a no brainer.
To Install vCenter 5.1 Inventory Service
1. Launch the installer using an account with administrator privileges
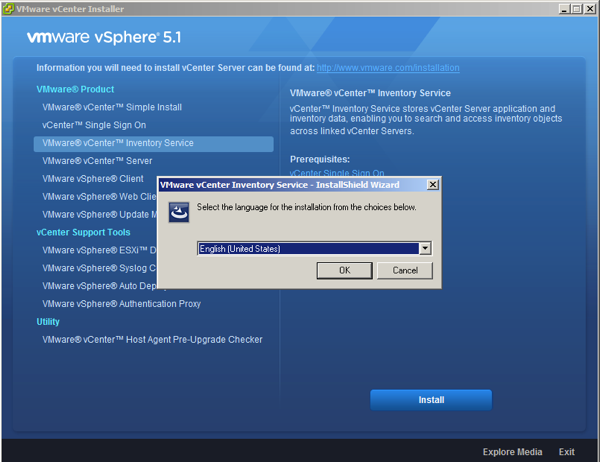
2. Select VMware vCenter Inventory Service from the VMware Product Installers menu and click Install.
3. Select the setup language and click OK.

4- After the Welcome screen is displayed, click Next.

5- Accept the agreements and hit next


6- Choose the installation Destination folder and hit Next

7- Fill your vCenter Server FQDN and hit next

8- Confirm the ports to be utilized by vCenter Inventory Service and hit Next.

9- Select the inventory size that best describes your vCenter Server deployment and hit next.

10 – Enter the information to register Inventory Service with vCenter Single Sign On.

11- Hit Install Certificates when prompted.

12 – On the ready to install page hit install.

13- Wait till the installation is completed and that should conclude your vCenter 5.1 Inventory Service Installation.
The next service to install is the vCenter Service and the next post in the series which will demonstrate just that can be found at: vCenter 5.1 Installation(Part 4) – vCenter Service Step by Step