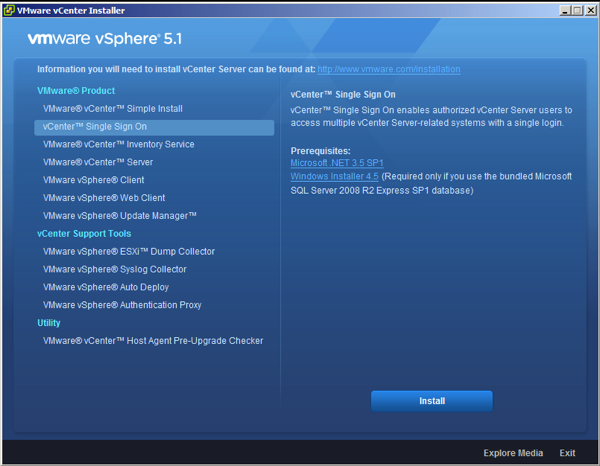
During the installation of vCenter 5.1, you will need to install 3 components in the following order: Single Sign On => Inventory Service => vCenter Service. In a new installation I would normally install the Web Service after installing the vCenter Service, though during an upgrade I would install the web service right after the Single Sign On service to be able to use it just in case I wanted to check on my Single Sign On configuration or want to troubleshoot. As this guide assuming a new installation we will leave the Web Client Service to the end. In this post, I will demonstrate the installation of the Single Sign On Service.
Preparing Databases for vCenter Components
Three vCenter components require a database. Single Sign On, vCenter Service, & Update Manager each of those components require its own database, where the creation of those databases have been documented at the first post in this series found at: vCenter 5.1 Installation(Part 1) – Preparing the Databases.
Alright now you have your databases ready let’s start the process of installing vCenter Components. The first component to install as mentioned earlier is the Single Sign On Service, which is documented in a step by step fashion below.
To install Single Sign On
1- Start the vCenter Installation Wizard

2- Click on vCenter Single Sign On, click Install to start the Single Sign On installer.
3- Select the desired installation language and hit OK

4- Click next to start the Single Sign On Installation Wizard

5- Accept the agreement and click next


6- Choose the “Create the primary node for a new vCenter Single Sign On installation” as this is the first vCenter Single Sign On instant & Click Next.

7- Check the “Create the primary node for a new vCenter Single Sign On Installation”. This will allow us to setup high availability mode in the future.

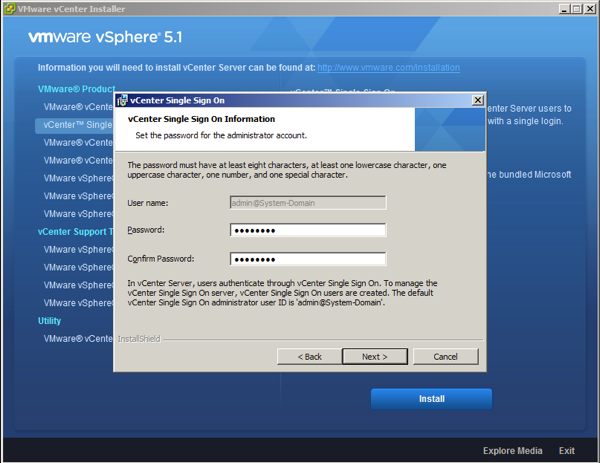
8- Fill the admin@System-Domain password then hit next.

9- Choose the “Use an Existing Supported Database” as the built in database is limited to a small environment.

10- Fill the database information with the earlier created databases info as shown in the below screenshot.

11- Fill the fully qualified domain name of your SSO server name as per the screenshot below and hit next.

12- Choose the SSO installation destination folder and hit next

13- Confirm the https port to be used by SSO and hit next.

14-On the Ready to Install screen hit install to start the installation.

15-On the SSO installation completion screen hit finish and then check the installation logs for errors

This should conclude the installation of the Single Sign On service. To continue with the installation of the rest of vCenter Components you will want to follow the rest of this series posts found at:
vCenter 5.1 Installation(Part 3) – vCenter 5.1 Inventory Service Installation
vCenter 5.1 Installation(Part 4) – vCenter Service Step by Step
vCenter 5.1 Installation(Part 5) – vSphere Web Client Step by Step