 There is often the situation where you need to change the IP addresses of your NSX-T Managers. For example, you might be changing your IP schema as I am doing currently in my home lab. NSX-T does not have a field to change the IP address of it’s NSX Managers, but you will need to add new NSX Managers with the new desired IP, then gradually delete the old ones. Luckily the process is easy and straight forward as documented below.
Note: While I only have a single NSX-T Manager in my environment as it is a small home lab, usually in a production environment, you always want to maintain 3 NSX Managers active to sustain your NSX-T availability. Try to follow one of the below two approaches to maintain that.
-
Scenario A:
- Manager A has IP address 172.16.1.11.
- Manager B has IP address 172.16.1.12.
- Manager C has IP address 172.16.1.13.
- Add Manager D with a new IP address, for example, 192.168.55.11.
- Remove Manager A.
- Add Manager E with a new IP address, for example, 192.168.55.12.
- Remove Manager B.
- Add Manager F with a new IP address, for example, 192.168.55.13.
- Remove Manager C.
- Manager A has IP address 172.16.1.11.
-
Scenario B:
- Manager A has IP address 172.16.1.11.
- Manager B has IP address 172.16.1.12.
- Manager C has IP address 172.16.1.13.
- Add Manager D with a new IP address, for example, 192.168.55.11.
- Add Manager E with a new IP address, for example, 192.168.55.12.
- Add Manager F with a new IP address, for example, 192.168.55.13.
- Remove Manager A, Manager B, and Manager C.
- Manager A has IP address 172.16.1.11.
-
Scenario C: (Not recommended. Only use if there is a very high resources constraints in the environment, as you won’t maintain 3 nodes available in your setup during this upgrade process)
- Manager A has IP address 172.16.1.11.
- Manager B has IP address 172.16.1.12.
- Manager C has IP address 172.16.1.13.
- Remove Manager A.
- Add Manager D with a new IP address, for example, 192.168.55.11.
- Remove Manager B.
- Add Manager E with a new IP address, for example, 192.168.55.12.
- Remove Manager C.
- Add Manager F with a new IP address, for example, 192.168.55.13.
- Manager A has IP address 172.16.1.11.
Add New NSX Manager
- Under the System tab in the NSX-T manager page go to configuration, Appliances.
- Hit the “Add NSX Appliance” tile
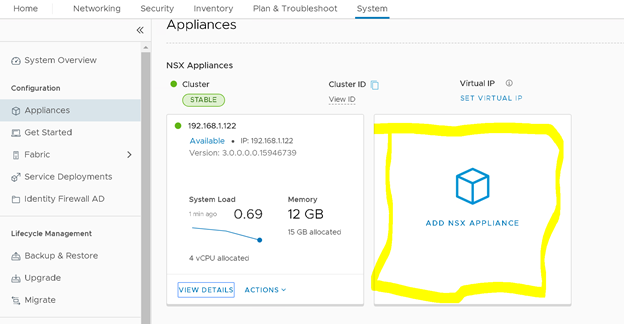
3. Follow the instructions in the screen to fill the desired info for the new NSX Manager
4. Wait for few minutes till the New NSX Manager is added and in full sync with your other NSX managers, before you starting to delete one of the old ones.
Delete the old NSX Manager
- Login to the NSX manager using the new IP or FQDN
- Go the system tab on the top of the screen
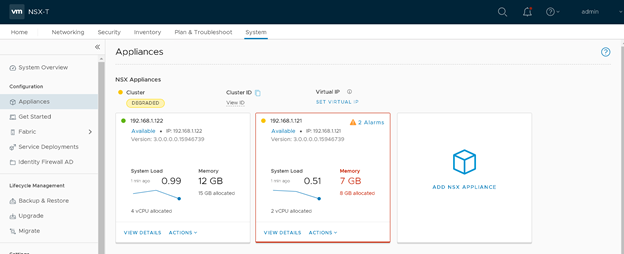
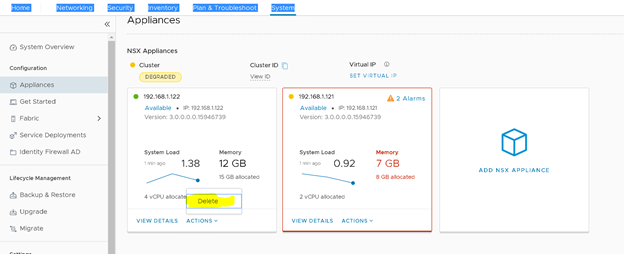
Note: The above method only works if the NSX Manager was automatically deployed using the NSX Manager UI. This will not work for your first NSX manager that was deployed manually. The delete button will be shaded in that case as shown in the below screenshot
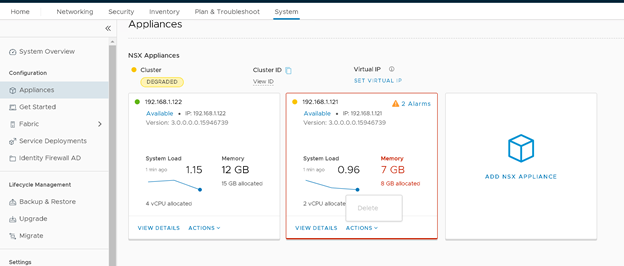
- Login to the new controller cli and run the following command: detach node <node-id>

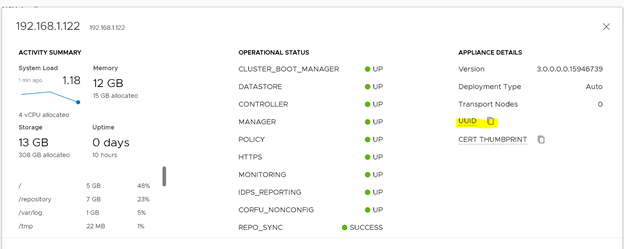
Note: If you are wondering where to get the node ID, it is easily availably in the GUI, if you hist the view details on the appliance, just copy the UUID of the appliance as showing in the below screenshot
2. Delete the old NSX Manager Virtual Appliance and make sure it is totally removed from your vSphere environment.
Repeat the above steps for the rest of the NSX-T Managers you need to replace. After that, you are done!