As the VMware Cloud Director has been evolving and adding features to help cloud providers better serve their customers, and help them target new markets, we are introducing Cloud Director App Launchpad bundled as a free extension with Cloud Director 10.1. App Launchpad will allow the Cloud provider to offer a Curated catalog of applications for vCD tenants, where they can deploy applications at a single click. The end user will be able to deploy these applications without having to understand the infrastructure it hosts it, networking configuration, firewall, Public IP or so on, as all of it will be automated in the back-end.
As VMware had acquired Bitnami (The leader of Packaged Open Source Applications) a bit over a year ago, it makes no surprise to anyone that Bitnami provides over ~130 Open Source Applications ready to serve to end tenants in the Cloud Director App Launchpad. That’s not all, as beyond the Bitnami, Cloud Director App Launchpad support another two sources for applications:
- ISV apps from VMware Cloud Marketplace
- In-house apps
This will allow our cloud providers to have a nicely populated catalog from day one as well the freedom to add their own custom offering to it. Before starting on the installation instructions, the below screenshot demonstrate what the marketplace of App Launchpad look like:
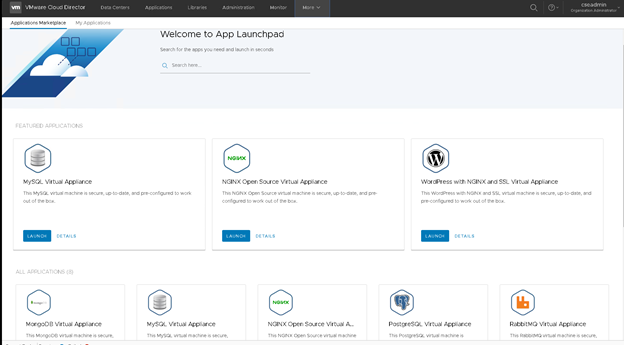
You can check out my following post for a nice detailed demo of VMware Cloud Director App Launchpad at: Cloud Director App Launchpad Demo
Now you know how nice it looks like, let’s get started on how to get it up and running. The installation will include two main components including AMPQ (if not already installed) and a CentOS VM to host the App Launchpad software.
Alright, let’s start by covering pre-requisites:
- Cloud Director 10.1, 10.0, and 9.7 are all supported
- Please check the release notes of the particular Cloud Director version to find out the AMQP version it supports.
- You will need a CentOS Linux 7 or 8 with the following specs:
- Minimal: 2 vCPU, 4GB RAM, 8GB Free Disk Space
- Optimal: 4 vCPU, 16 GB RAM, 120 GB Free Disk Space
Preparing AMQP for App Launchpad
As I did not have AMQP previously installed in my environment, I have decided to use the easy route of utilizing the free open source Bitnami image of Rabbit MQ. The version I have used was 3.8.3-1 as shown in the below screenshot.
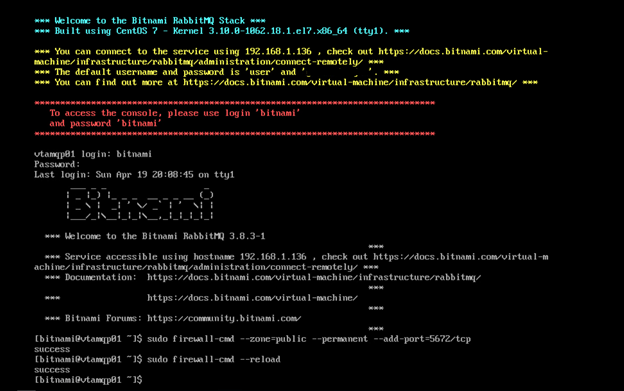
After deploying the RabbitMQ virtual appliance in your environment from the OVA image provided, you will need to login using the username and password provided in the login screen. As the virtual appliance does not open the required ports by default you will need to execute the below two commands:
sudo firewall-cmd –zone=public –permanent –add-port=15672/tcp
sudo firewall-cmd –zone=public –permanent –add-port=5672/tcp
sudo firewall-cmd –reload
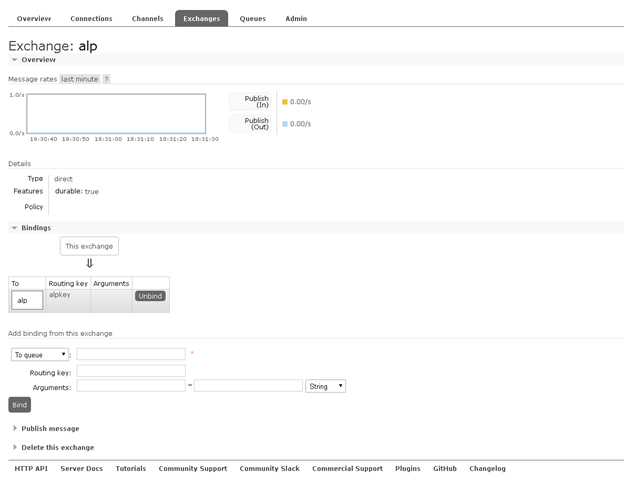
Great now your Rabbit MQ is ready to be configured, here is the configuration of the exchange I have created for my APP Launchpad in Rabbit MQ. You should be able to use something similar.
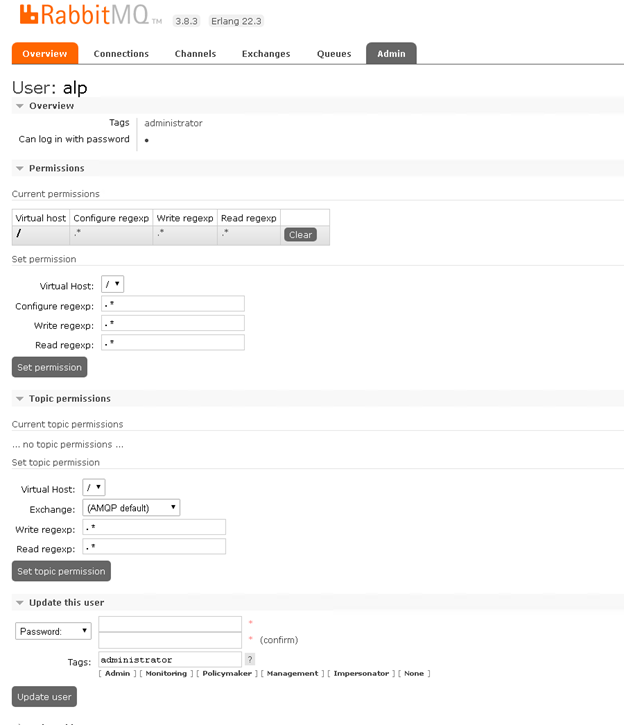
Here is the user configuration in my Rabbit MQ for the alp user I am using for my App Launchpad as well.
Here is as well my Cloud Director AMQP configuration page:
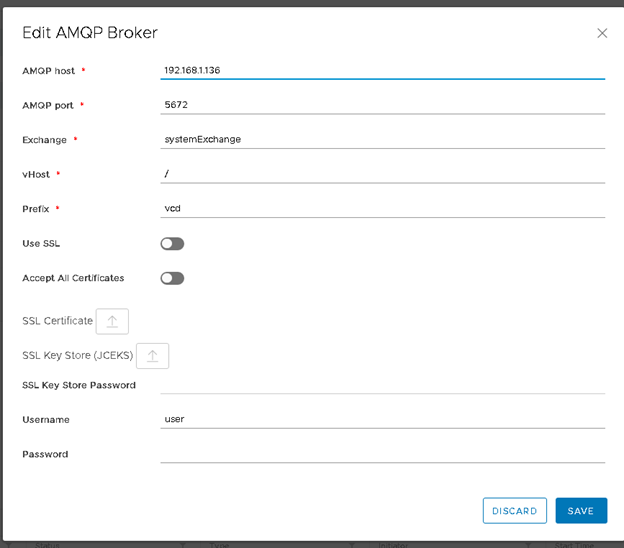
Installing Cloud Director Launchpad
Alright now that I have my AMQP in place, it is time to setup the App Launchpad software. You will need to install CentOS Linux 7 or 8 with the default setting then follow the below instructions to install the App Launchpad after downloading the installer from: App Launchpad 1.0 download link
-
Change the permission on the downloaded installer using below command:
[root@vtalp01 tmp]# chmod +777 vmware-alp-1.0.0-15936169.x86_64.rpm
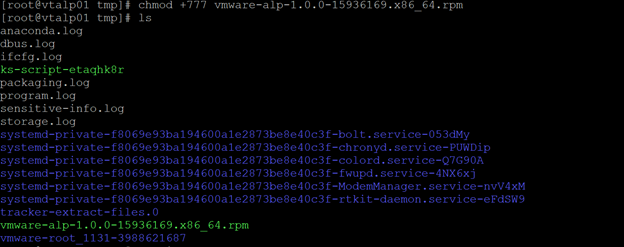
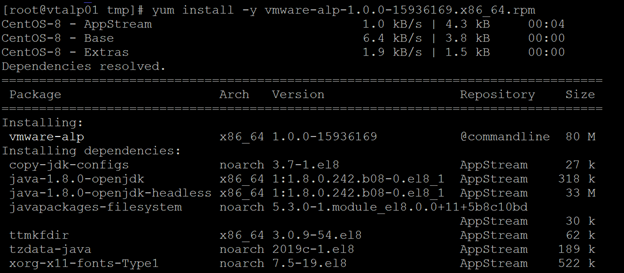
2. Install the rpm using the yum install command.
[root@vtalp01 tmp]# yum install -y vmware-alp-1.0.0-15936169.x86_64.rpm
3- Run the command to configure VMware Cloud Director App Launchpad to connect to the AMQP exchange we have created as well to Cloud Director be executing the following command, then accepting the certificates and confirming your Cloud Director settings.
[root@vtalp01 tmp]# alp connect –sa-user alpadmin –sa-pass ‘MyPassword’ –url https://vtvcd01.vt.com –admin-user administrator@system –admin-pass ‘MyPassword’ –amqp-exchange alp –amqp-user alp –amqp-pass ‘MyPassword’
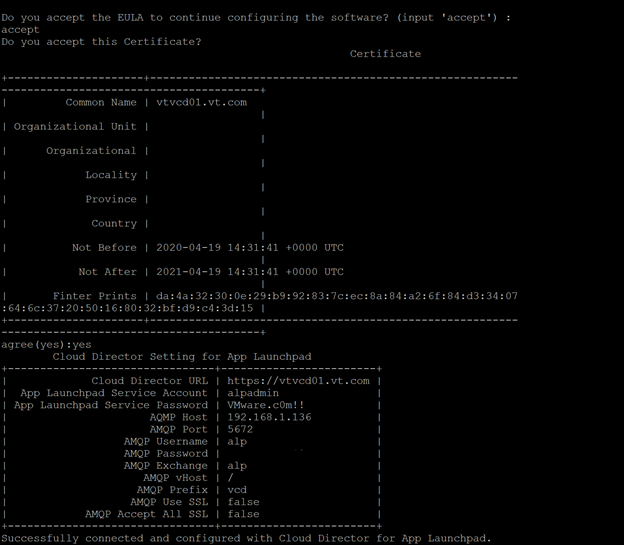
4. You can run the alp show command to review the configuration of your App Launchpad before starting the service
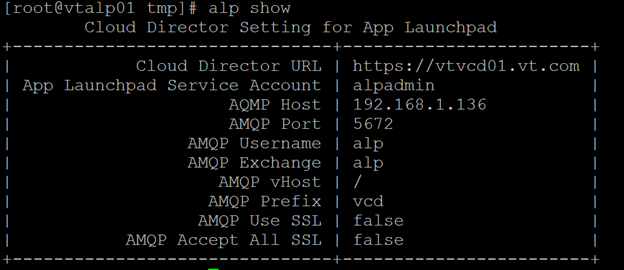
5. Start the App Launchpad service by executing the below command
systemctl start alp

Cloud Director App Launchpad Initial Configuration
- Violaaa! You now have App Launchpad fully installed and ready to be used. Go to your Cloud Director and from the top dropdown menu navigate to App Launchpad

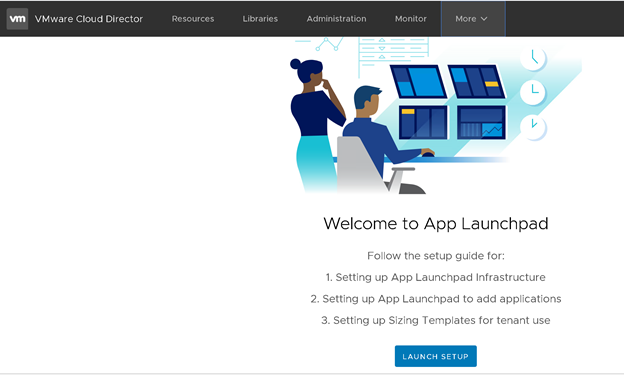
2. Choose the “yes, set it up” and provide the setup information specifications desired for your own environment.
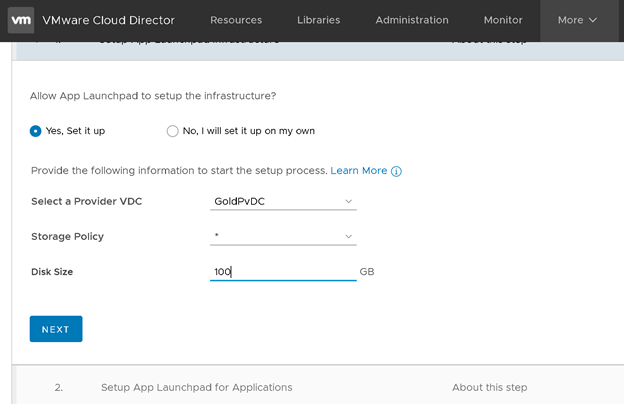
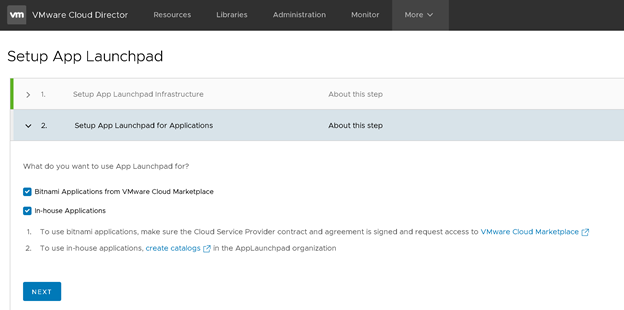
-
- Enter a name for the sizing template.
- Enter a vCPU count, a memory size (in GB), and a disk size (in GB).
- (Optional) Select the current template as the default sizing template. This is nice as it allow deployment of applications by a single input of the desired application deployment name.
- (Optional) Add more sizing templates by clicking Add More and completing steps a to c.
- To complete the initial configuration of App Launchpad, click Finish.
- Enter a name for the sizing template.
4. At this stage you are ready to start subscribing to Bitnami images or add your own to your App Launchpad marketplace and start serving it to your end customers. I will demonstrate that in the following blog post: Cloud Director App Launchpad + Bitnami Demo
Hope you and your customers will enjoy our new App Launchpad!!