As many Cloud Providers have started showing interest in delivering AI as a service, and with VMware Private AI Foundation with Nvidia hitting the market, we started getting the following questions often, which I will try to answer in this blog post:
- Does VMware AI Workstation (VMware Deep Learning VMs) work in a Cloud Director setup?
- Do you support VMware AI Workstation (VMware Deep Learning VMs) or for short called DLVM to run on VMware Cloud Director?
- How to deploy the Deep Learning VMs in Cloud Director?
As we started to get more and more of those requests, I started working with few of my colleagues Agustin Malanco Leyv, Ross Wynne, and engineering to verify it. Here is the answer for those and more.
- Does VMware AI Workstation (VMware Deep Learning VMs) work in a Cloud Director setup?
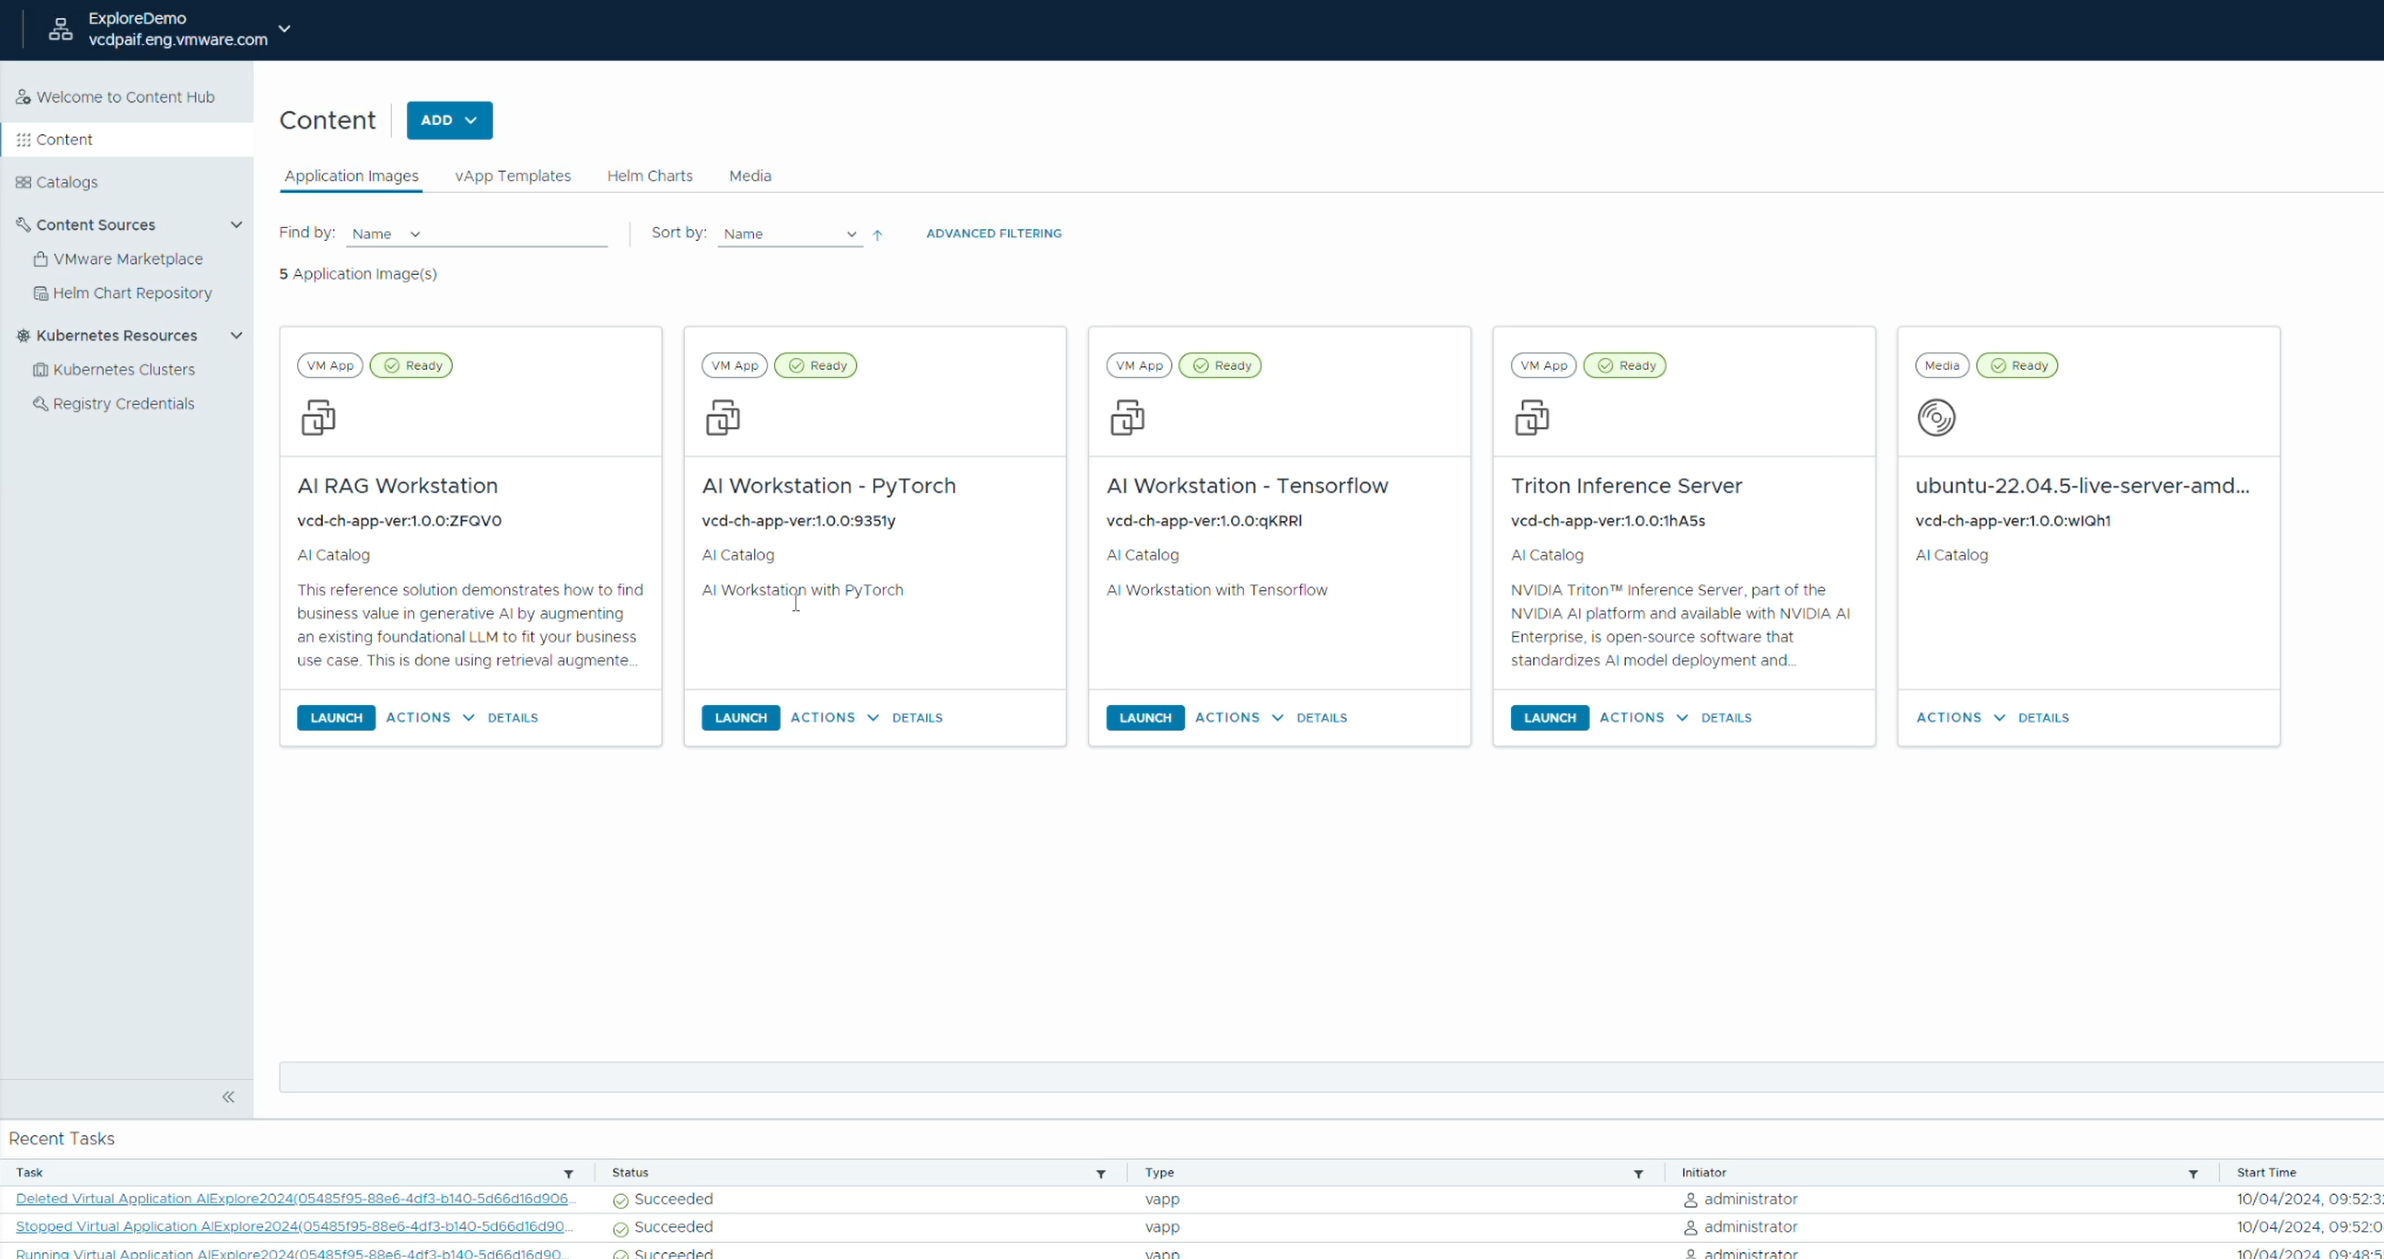
Yes, absolutely it does. The below video share the VM Explore Demo we are presenting in VM Explore Barcelona showing how to deploy a VMware Deep Learning VM (DLVM) on VMware Cloud Director. As the video below does not have a sound, I would suggest you turn on the caption to get more insight as you run it.
- Do you support VMware AI Workstation (VMware Deep Learning VMs) or for short called DLVM to run on cloud director?
DLVM is supported as long it runs on vSphere and you have acquired the required licenses (VCF, PAIF, and NVIDIA Enterprise AI). As Cloud Director will deploy the unmodified DLVM images on vSphere, you will be entitled for support.
- How to setup & deploy DLVM in VMware Cloud Director (VCD)?
This is the question I will spend most of this blog post answering. Let’s look at the steps needed to achieve this.
Deploying Deep Learning VM in VMware Cloud Director in a step by step fashion:
- In VMware Cloud Director Make sure you trust the certificates of vCenter, ESXi hosts, and the source website where the DVLVMs are and the cert that come with the DLVM.
- Make sure you enable a GPU Policy in your Cloud Director. If you are not familiar with that, I am planning to add a post on that too. I will update a link to the post as it gets ready.
- Make sure you import the latest workable image from the URL provided to you with the Private AI Foundation. Unfortunately I can’t publish that link in here as it’s not a public URL.
- The version we have tested with is ubuntu-2204-v20240814. Make sure you use the same version and import directly the OVF using the url to avoid issues.
- Now that you have the image ready, go ahead and deploy a VM from the uploaded OVF Image.
- While deploying a VM from the image make sure to complete the following steps:
- Configure the VM to pickup IP from IP Pool or DHCP, as well provide the name you want it to use.
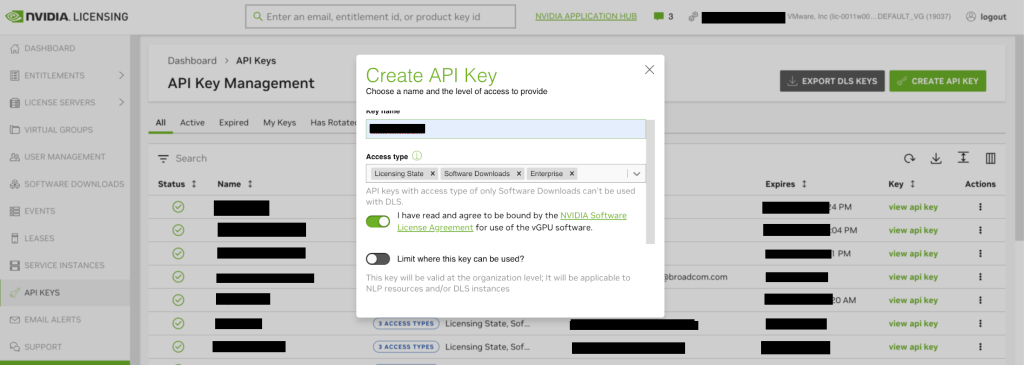
- Sign up for NVIDIA Portal API key and NVIDIA License Token, and supply those to the image as it’s getting deployed. If you are not familiar with this below are a great NVIDIA resources that will help you do that in a step by step fashion:
Get NVIDIA API Key: Once logged in into your NVIDIA Licensing Portal, go to API Keys and generate one just as shown in the below screenshot

Get NVIDIA License Token: https://docs.nvidia.com/license-system/latest/nvidia-license-system-quick-start-guide/index.html#:~:text=A%20DLS%20instance%20is%20created,with%20the%20NVIDIA%20Licensing%20Portal
- In the Encoded On-line Command, make sure to copy the encoded one-line command to install your desired AI Platform. You can find those at: https://docs.vmware.com/en/VMware-Cloud-Foundation/5.2/vmware-private-ai-foundation-nvidia/GUID-5347C2DB-BED3-4CAD-BD1E-2A1ECD7E9E0B.html#pytorch-3. Below I am showing an example for PyTorch. You will find a similar one for other AI Platforms on the shared link:
#######  PyTorch Encoded On-line Command Encoded  ######

ZG9ja2VyIHJ1biAtZCAtcCA4ODg4Ojg4ODggbnZjci5pby9udmlkaWEvcHl0b3JjaDoyMy4xMC1weTMgL3Vzci9sb2NhbC9iaW4vanVweXRlciBsYWIgLS1hbGxvdy1yb290IC0taXA9KiAtLXBvcnQ9ODg4OCAtLW5vLWJyb3dzZXIgLS1Ob3RlYm9va0FwcC50b2tlbj0nJyAtLU5vdGVib29rQXBwLmFsbG93X29yaWdpbj0nKicgLS1ub3RlYm9vay1kaXI9L3dvcmtzcGFjZQ==
All you need is the single one line command encoded above. Don’t copy the comment, just the base64 encoded line. Below is what that encoded line refer too in open text:
####   PyTorch Encoded On-line Command clear text  #####

docker run -d -p 8888:8888 nvcr.io/nvidia/pytorch:23.10-py3 /usr/local/bin/jupyter lab --allow-root --ip=* --port=8888 --no-browser --NotebookApp.token='' --NotebookApp.allow_origin='*' --notebook-dir=/workspace
7- If you have completed all the steps above, you will now be able to use PyTorch with Jupitar lab after your deep learning VM deployment is completed. You will be able to access it at: <Your IP>:8888. Below is a demo of what that look like. As the video below does not have a sound, I would suggest you turn on the caption to get more insight as you run it.
JupyterLab that get deployed using the One Line Command provided in this tutorial adds a great web based interactive development environment that actually quite nice and provide some nice examples and tutorials. Give it a try.
Hope you find this article helpful. Feel free to reach out to me on LinkedIn or to your Cloud Provider Rep for more info on our AI as a Service offering.
