There is many reasons why you would want to integrated your vRA with NSX including on demand networking and security. If you have found this page, you probably had already figured out your reason, so I am not going to spend much time on that. Let’s get to how to do it!
In order to be able to use NSX on demand capabilities in your vRA, you will need to integrated the two together. Today this happen in vRA using the NSX plugin for vRO. The below instruction will document the steps you need to integrate your vRA 7.2 environment with VMware NSX 6.3. These instructions should work with a very little modification for other versions of vRA 7.x and NSX 6.x.
Install the NSX Plugin for vRealize Orchestrator
1- Download the NSX Plugin for vRO (Latest at the time of this post is 1.0.4) from the following link: NSX Plugin for vRO 1.0.4
2- Go to your vRO Control Center by going to: https://vtvro01.vt.com:8283/vco-controlcenter/ and login using root and the password you supplied during installation.
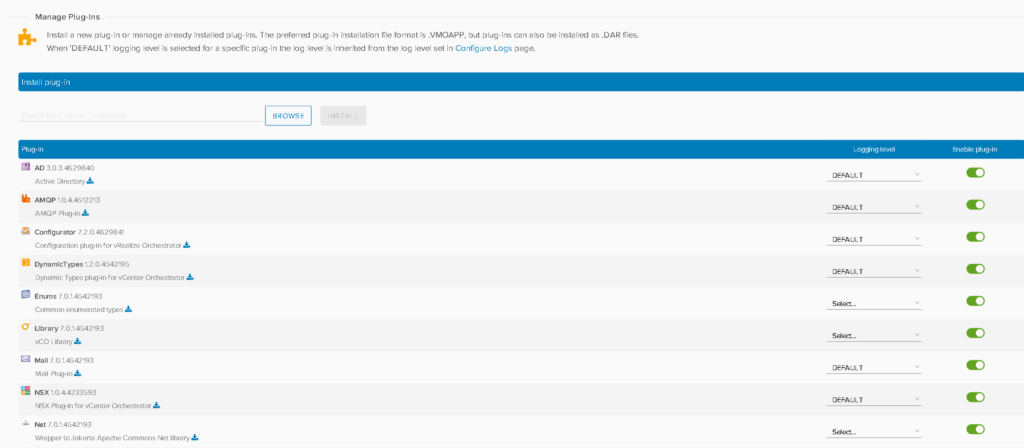
3- From Under Plugins click on the Manage Plug-Ins icon.
4- Hit Browse and choose the downloaded NSX for vRO Plugin (Mine was called: o11nplugin-nsx-1.0.4.vmoapp)
5- Hit Install
6- Under Manager, hit the Startup Options
7- Hit Restart and wait for the service to load. If it still says vRO need to be restart, just go to the VAMI and restart the vRO Appliance. Below how the NSX Plugin should look like when done with installing it in vRO.
Create NSX Endpoint in vRealize Orchestrator
Now that you have the NSX Plugin installed in vRO, it is time to create NSX Endpoint in vRealize Orchestrator which can be done using a vRO workflow that was added as a part of the NSX Plugin installation.
1- Go to https://vtvro01.vt.com:8281/vco/.
2- Hit Start Orchestrator Client and when the Java Client popup login using proper credentials. If you have not yet setup an identity source you can use the default user vCOAdmin, but if you have setup an identity source, you might need to use administrator@vsphere.local or an AD account to login depending on the identity source configured. If you don’t have Java as well, you will be prompted to install it to get vRO Client Started.
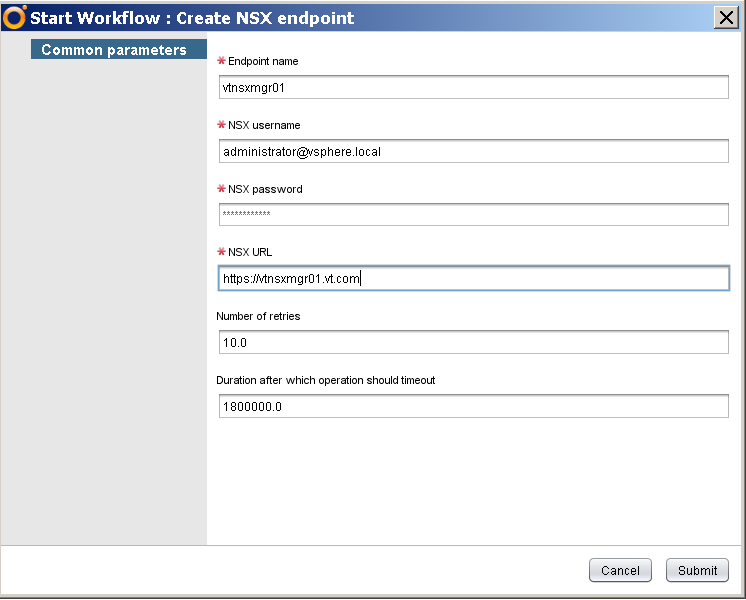
3- Run the workflow “Create NSX Endpoint” from under Library => NSX => Configuration
4- Complete the configuration as per the below screenshot:
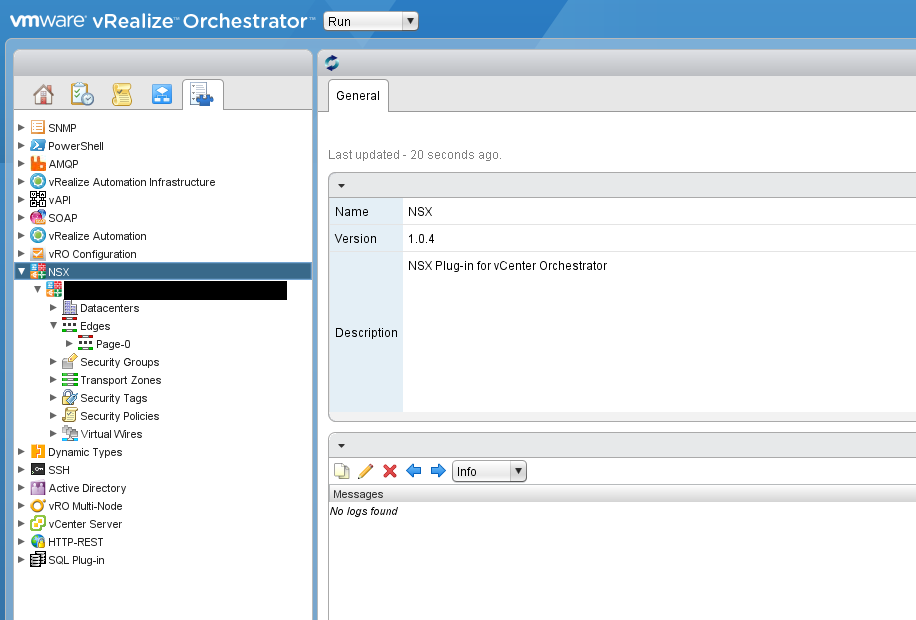
5- Now if you hit your inventory tab, you should be able to see your NSX components in it as in the below screenshot
Add vRO Endpoint to vRA
Now that NSX Plugin is installed and configured in your vRealize Orchestrator, we are ready to add our vRO endpoint to vRA. Below the steps on how to do it:
1- Login to your vRA Tenant
2- Go to Infrastructure => Endpoint => Endpoint
3- Choose “vRealize Orchestrator” from the new endpoint drop down.
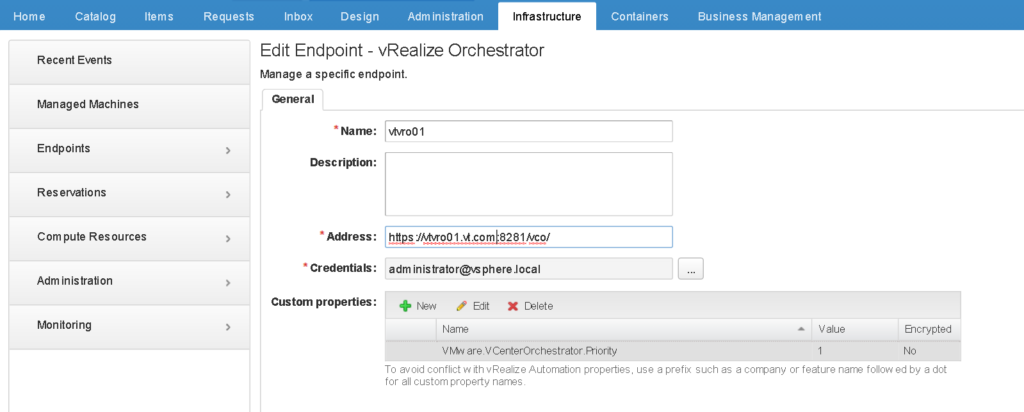
4- Fill your vRealize Orchestrator information as shown in the below screenshot (Note the VMware.VCenterOrchestrator.Priority Customer Property as that is required), then hit OK
5- Right click the newly created vRO endpoint and click Data Collection.
6- Hit start to run a data collection and make sure it succeed before proceeding to the next step.
Modify vCenter Endpoint for NSX
Now that your vRO Endpoint is ready, it is time to add NSX to your vCenter Endpoint as follow.
1- Go to Infrastructure => Endpoint => Endpoint
2- Click on your current vCenter Endpoint to modify it
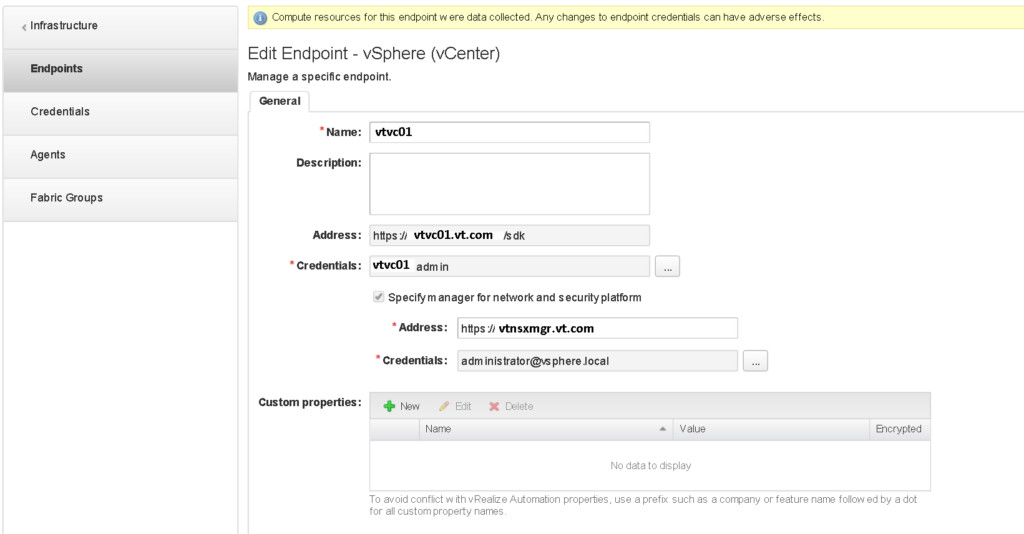
3- Check mark the option “Specify manager for network and security platform” and then fill your NSX info as per the below screenshot. Hit OK.
4- Go to Compute Resource, Right Click your cluster, and then hit Data Collection
5- Run Data Collection for Network and Security Inventory, and make sure that succeed.
If all of the above is complete, then you are ready to start consuming NSX in your vRA environment. I will try in a future post to cover how to configure on demand networking, routing and security. Hope you find this post useful to get started.